Adsence

ラベル EVO 3D の投稿を表示しています。 すべての投稿を表示

2012年12月1日土曜日

ISW12HT=EVO3DにJBことAndroid4.1ベースのカスタムROMをインストールしてみた!カスタムROMインストール方法紹介

自己責任をよく頭に入れて進んでください。

≪暇人脱獄Blog記事抜粋≫
  ■準備

 ・S-OFF済 BootloaderUnlock済 ClockWorkMod=CWMインストール済のISW12HT S-OFF & BootloaderUnlockについては暇人脱獄Blog過去記事参照 ⇒ 参考資料S-OFF ClockWorkModインストール方法についても過去記事参照 ⇒ 参考資料CWM 

・エロい方が修正したAOKP カスタムROM(Android4.1ベースROM) ⇒ ここかな
・Android4.1用Googleアプリ ⇒ gapps-jb-20121011-signed.zip

  ■カスタムROMインストール
もう一度自己責任の確認とエロい方々に一礼しましょう! 

0.前もってDLしたカスタムROMとGoogleアプリのZIPファイルはISW12HT内の分かり易いフォルダに移動しておくこと

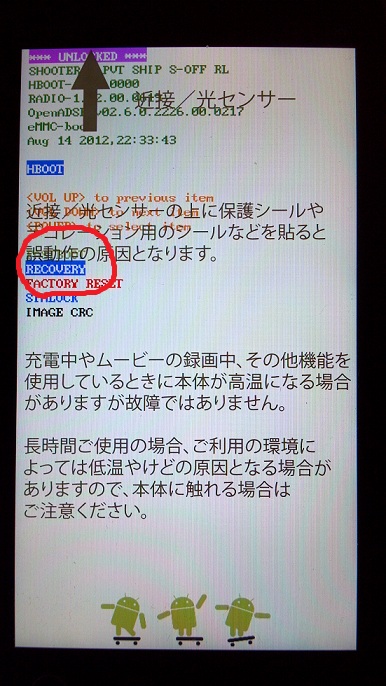
1.CWMインストール済 ISW12HTのBootloader起動
2.BootloaderのRecovery選択
  カスタム1
 3.CWM起動
  カスタム2 
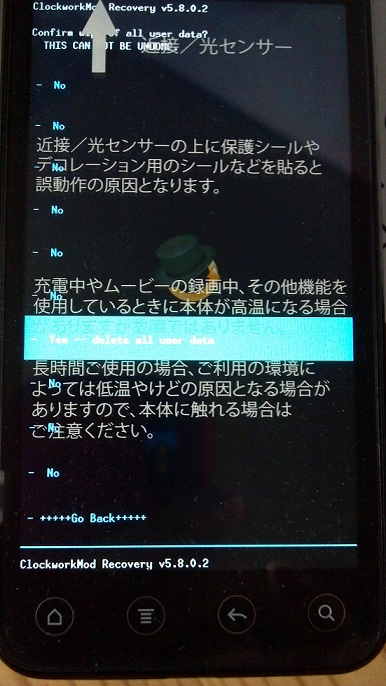
4.wipe data/factory reset 選択
5.Yes-delete all user data 選択ですべて削除します(SDカード内は削除されませんが、何かあると困りますので削除されてもいい覚悟で)
  カスタム3
 6.wipe cache partition でcacheも消します
  カスタム4 
7.確実なクリアーをお考えの方はその他のSystemやData、SDカード等のフォーマットも同時に行ってください。(私は何か不具合がなければそこまでしませんけど・・・・)
8.きれいにしたらinstall zip from sdcard を選択します
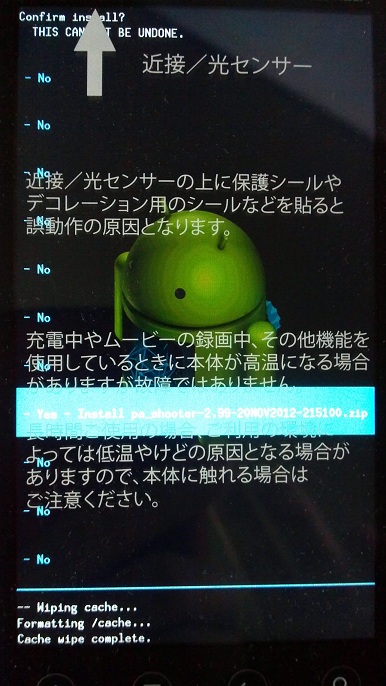
9.カスタムROMを映したフォルダをしていしてYesでインストール開始です。
カスタム5
※画面内ROM名が違いますが気にしないでください。 
10.一旦画面は止まります。I Agree~を選択して Next>
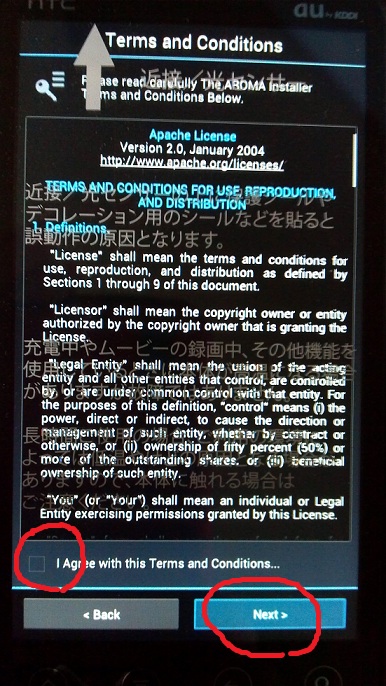
  カスタム6 
11.次に止まる場面がきます。枝分かれ選択になるようですが、カスタマイズしたエロい方からの指示で【default,typical,minimalist,customを選ぶとこがあるのでminimalistを選んでください 】とのこと(画像がなくてスミマセン)。選択すると下の画面が表示されますので一番上で次選択
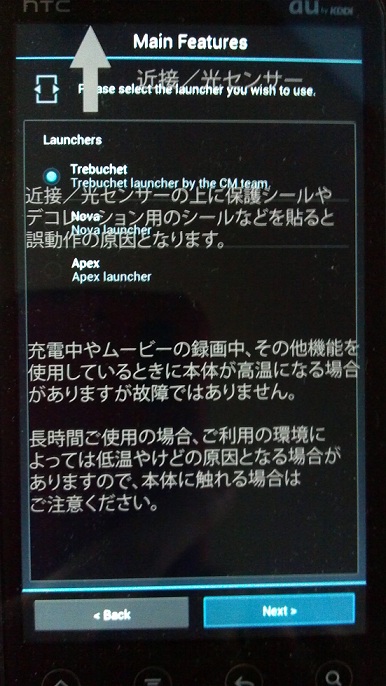
カスタム7 
12.Ready To Install画面になるのでInstall Nowでいよいよインストール開始です。
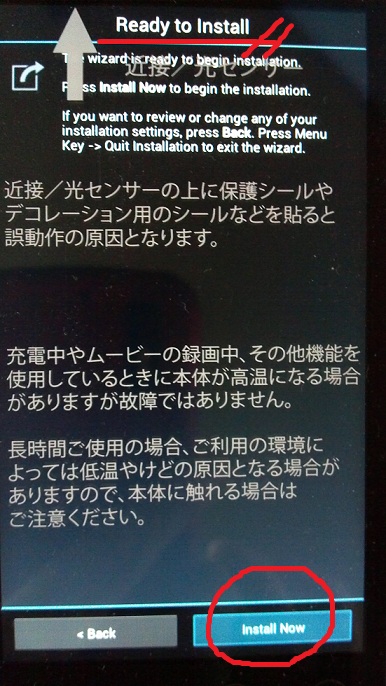
カスタム8 
13.あとは数分見ているだけです。完了後再起動がかかりAOKP ROMが立ち上がります。
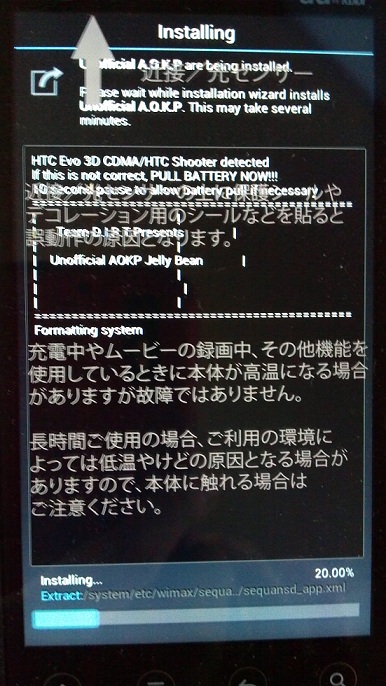
  カスタム9
14.無事起動後、再度終了させもう一度Bootloaderを起動させます。
15.CWM起動してinstall zip from sdcard からAndroid4.1用GoogleアプリのZIPファイルを選択しインストールして終了です。このインストールは直ぐに終わるはずです。
16.手動で再起動をかけるとGooglePlayやその他のGoogleアプリがインストールされています。

 ■カスタム版 AOKPカスタムROM(Android4.1)の動き

・動き自体はかなり良いと感じる
・adbが受け付けないようだ?ddms.batも反応なし。
・カメラが強制終了する ・WiFiは問題なく動く
・3G回線は不明(白ロムの為)、WiMAXも不明だが禍根経験から無理だと断言する
・スクリーンショットはアプリでうまく動く(Android4.1標準のスクリーンショットは動かない)
・現時点で一般的な運用はできないと考えられる。弄り端末としてはGood。
・クロックは標準稼働
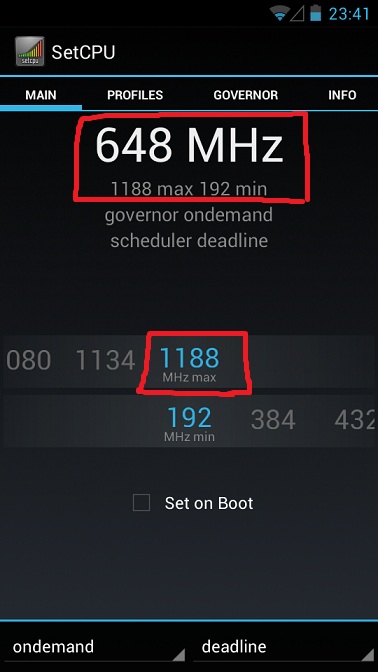
  ISW12HTCLOCK

このエントリーをはてなブックマークに追加


2012年5月6日日曜日

au ISW12HT EVO 3D S-OFF作業に光明が・・・

お馴染み XDAのDevelopersサイトにてEVO 3D CDMA方式用( This is for CDMA phones only! と書かれている)のS-OFF方法が記載されている。

どうも諸悪の根源HBOOTの1.50から1.40に買い替えればOKという流れ。

多分その通りだろう。

ISW12HTでもいけるはずだ!

XDA EVO 3D Site → http://forum.xda-developers.com/showthread.php?t=1547695

■EVO 3D(ISW12HT) S-OFF 方法(所謂BootloaderUnlock方法)

1.) Take your 2.17 ZIP image, put it on the root of your SDCard, call it PG86IMG.zip.

2.) With the phone on Battery power alone, Reboot to BootLoader, let it detect the zip and read and get to the point where it wants you to press Vol-Up to update.

3.) LET THE DEVICE SIT FOR AT LEAST a Minute or Two.

4.) Pull off the battery cover (careful not to let the battery fall out) and plug the device into AC power. (HTC Power charger, other chargers have been known not to work for this, the reason for this is that the HTC's power adapters output more power than the standard ones.)

5.) Pull the battery out. (The device should stay on, if it doesn't, start over and try again) Also, leave the battery out through the REST OF THIS GUIDE until told to put it back in.

6.) Here's the tricky part, Read this a couple times, be ready to pull the ac cable out at the right time... press the vol up key in, Give it approximately 5 seconds from the START of it saying the word "Updating" next to Bootloader (The very first one it flashes) Then Pull the charger cord promptly, and plug it right back in, if this worked right, you'll see the red charge light be VERY(VERY VERY) DIM, and it should stay solid for the most part. (See the FAQ in post 2 for more info on this step, if you're having issues.)

The device is now bricked and ready for the next part.


VIDEO OF STEP 2 (Removed for now, it's outdated)

The next step is the linux part. Do not plug your phone in to the linux box until you are told to do so. Very important.

1.) Boot up to Linux (I used Ubuntu, but I am guessing that any Linux OS will work)

2.) Extract your downgrade.zip file to the linux PC, Home folder is the best spot and is the easiest to work with.

3.) Open up Terminal, gain root, (su, or sudo -s)(give it your password)

4.) Run the command chmod 755 downgrade (if it's not in your home folder, add the full path to it)

5.) Type ./downgrade and press Enter.


To Be Continue


やってみますよ^^